You will not need a camera to experience the Aurora Borealis, but if you have one you might want to try photographing the Aurora! We have tried to make the best northern light photography guide for you to study before the start of your tour.
It is a good idea to study the technical aspects of northern light photography beforehand, as at night in the cold you will quickly get cold and clumsy fingers. You don’t have to remember everything beforehand, we will give you tips during the tour!
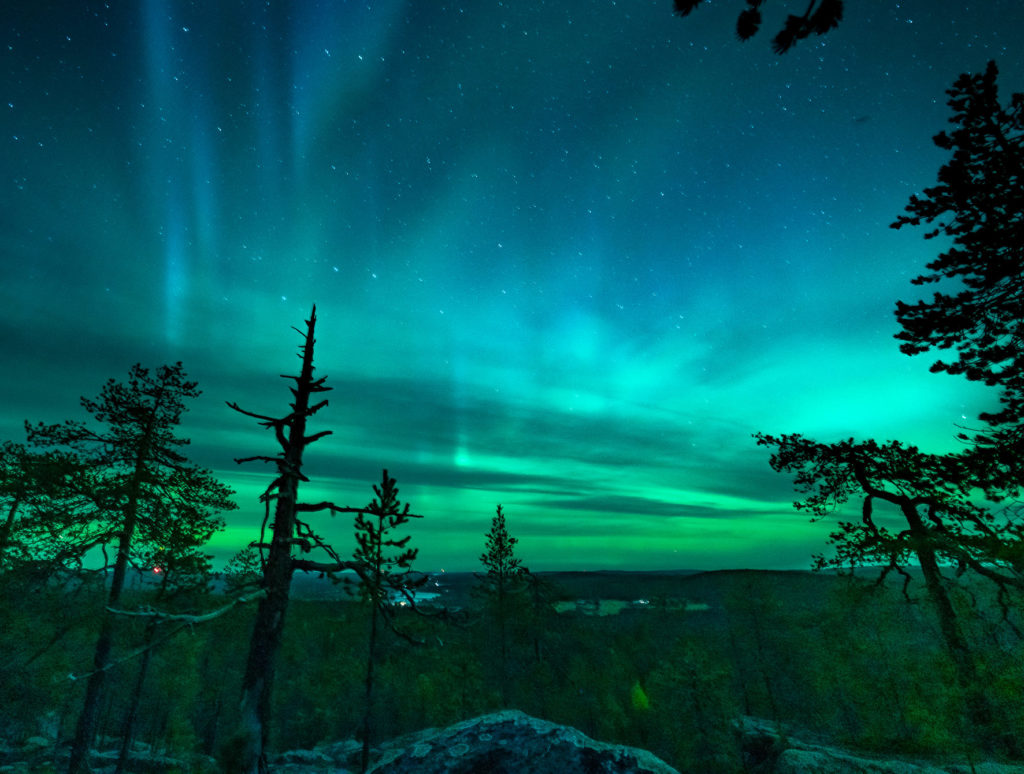
LOCATION, ENVIRONMENT AND TIMING
BEST LOCATIONS FOR NORTHERN LIGHT SPOTTING
The Northern lights often come in waves, so in order to capture them in a photo, you will have to reserve enough time for the photo shoot. For more information, check our post on how to find the Northern lights.
The darker it is, the easier it is to see the Northern lights. During our Aurora tours we will drive far from the city lights in order to see the aurora as strongly as possibly. In order to keep out the cold, we will enjoy hot beverages while waiting for the light show.
YOUR CAMERA
Most of us own a smartphone. Many of them have a manual mode in which you are able to change the exposure time or ISO sensitivity. The manual mode options of smartphones are still very limited, an for great Aurora photography you will need to use the manual mode. Read below why a DSLR or a mirrorless camera is the best choice for Aurora photography!
CAMERA SETTINGS
There are a couple of things that you should know about your camera settings when it comes to northern light photography. Many rules of night photography do apply, but we have to keep in mind that the northern lights move! So we have to try to catch as much light as possible without setting a super long exposure time.
Let’s look at the aperture, ISO and shutter speed settings next:
APERTURE
Aperture controls the depth of field (the part of the scene that appears sharp). Photos taken with a low aperture let in more light, allowing you to take pictures in the dark.
Lower f-numbers correspond to a larger entrance pupil for the lens and for our purposes, we should set the f-number as low as possible.
ISO
The ISO indicates the level of sensitivity of your camera when it comes to available light. We often have to use high ISO numbers when photographing the Northern lights, as we the northern lights move, and the exposure time cannot be increased endlessly. The problem that we face the is that when you increase the ISO, the grain/noise in the pictures increases as well. To tackle this problem, we post-process the pictures.
Take a look at this example: The photo on the left was taken with a too long of an exposure time and too low ISO. The Northern lights have become blurred. The picture on the right is taken on the same evening and with the same camera and lens, with increased ISO and shorter exposure time.


The ISO settings that you can use widely depend on the type of your camera. For northern light photography, you might want to start trying around ISO 800 to 1600.
SHUTTER SPEED
The shutter speed number indicates the length of time that your camera shutter is open to expose light into the camera sensor. As we explained earlier, the northern lights are a moving phenomenon that we photograph in a night setting. If the shutter speed was set to very low (10-30 seconds depending on the type of the aurora), the images produced would be blurry and unrealistic-looking.
We recommend that you start experimenting with an exposure time of 5 to 10 seconds.
THE EXPOSURE TRIANGLE
When photographing the aurora, you cannot change the shutter speed without changing the aperture and/or ISO, otherwise your photo will be under- or overexposed.
You will have to try around with the settings, as every environment is different. Many things affect the settings for northern light photography.
If you have a mirrorless Sony camera, there is a good chance that you will find a Metered Manual mode (M.M) in it. When you are photographing in manual mode, this indicator will tell you whether your adjustments are correct.
Some of the factors to consider:
Snow – Is there snow on the ground or not?
Full moon – The effect of the full moon has to be taken into consideration, as it illuminates the night scene. In combination with a snowy landscape it might at times prevent the northern lights from being seen/photographed.
Location – Take the effect of light pollution into consideration.
LENS FOCUS
Make sure that you have manual focus enabled and set the lens focus to infinity. This way the sky will not be blurred.
LENSES
If possible, use a wide-angle lens. This way you will be able to catch as much sky in the picture as possible. We use an ultra wide angle lens with a 113.9˚ angle of view.
BATTERIES
Make sure that the battery of your device is fully charged, as the cold drains batteries quickly! If you have extra batteries with you, be sure to take them along! It is also a good idea to keep your extra batteries in the inside pocket of your jacket to keep them warm.
TIPS FOR TAKING A PICTURE
Now you have your camera settings right and want to start photographing! Remember to use a tripod, as you don’t want the photo to shake. This is important due to the long exposure time of the picture.
Another useful way of preventing blurry pictures is to use a self-timer. This way you don’t accidentally move the camera while pressing down the button.
There are also some tips and tricks to taking well composed northern light pictures. We can give you tips in regards to photo composition during our tour.
POST-PROcESSING
All of the pictures on our website are post-processed. When you’re choosing an editing program for post-processing the pictures, make sure that you can edit the lightness of the picture, and preferably the amount of noise as well (The high ISO number during Aurora photography increases noise in the photos).
We use Adobe Lightroom in order to make the most out of the pictures. We always take pictures during our tours and will send the best ones to your e-mail afterwards.